

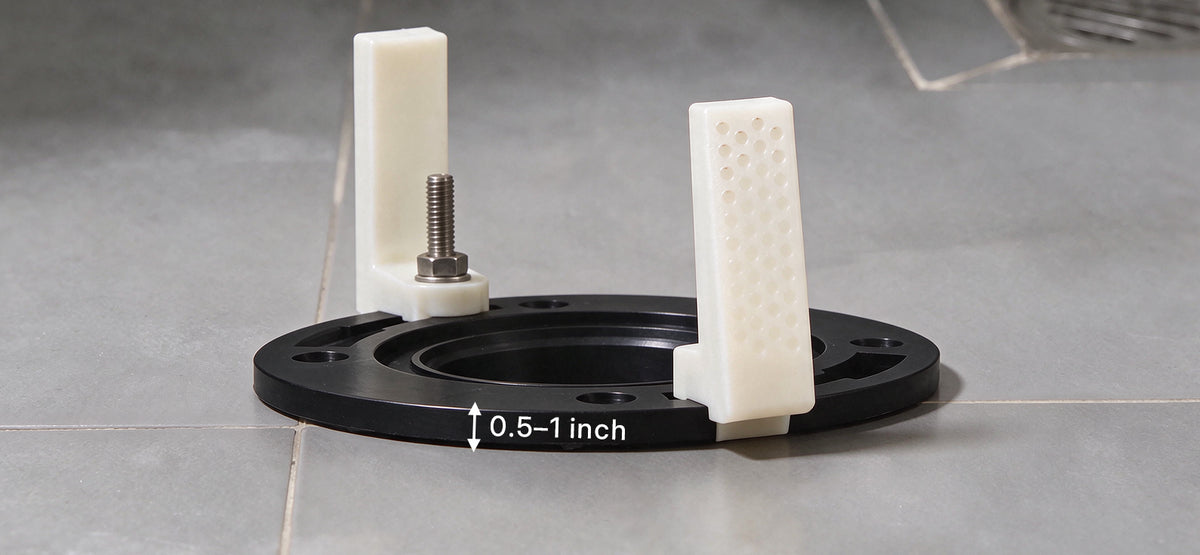
Flange sits 0.5–1 in above the finished floor
If the flange is below floor level, an extra-thick wax ring must be used; a below-floor flange will also leave the side mounting bolts too short.
EPLO Toilet Installation Guide
Prepare for a smooth EPLO smart toilet installation. Check rough-in clearances, flange height, angle valve, and power requirements before you install your EPLO toilet.
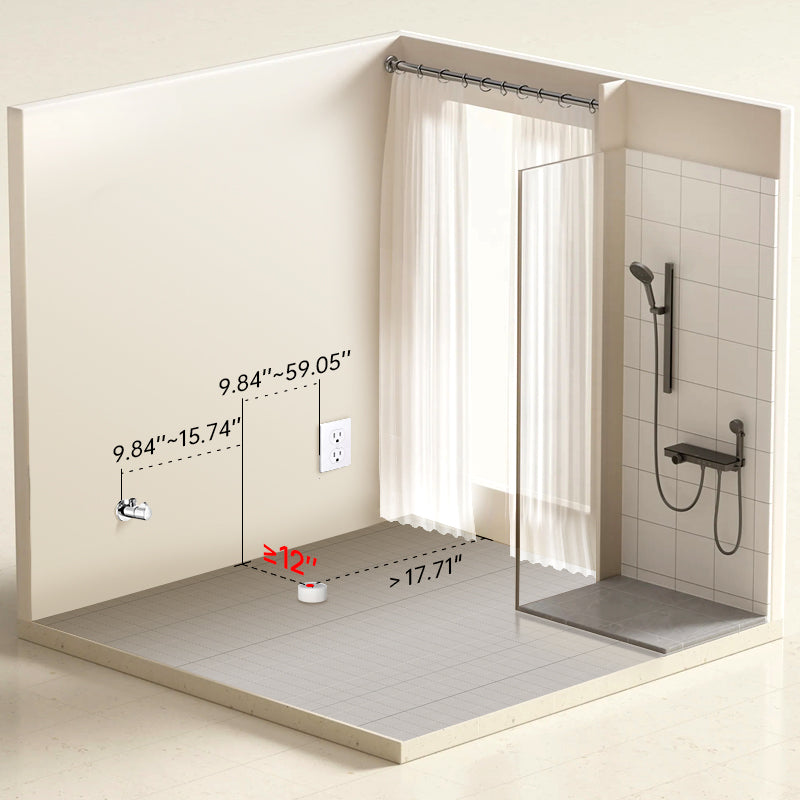
Essential rough-in measurements for smart toilet installation
Must be greater than 12 inches, measured from the finished wall to the center of the drain.
Avoid installing it directly behind the toilet, so it stays accessible for future maintenance and replacement. Keep it at least 9 inches from the centerline of the drain pipe.
Avoid installing it directly behind the toilet, so it stays accessible for future maintenance and replacement. Keep it at least 9 inches from the centerline of the drain pipe.
If the flange is below floor level, an extra-thick wax ring must be used; a below-floor flange will also leave the side mounting bolts too short.
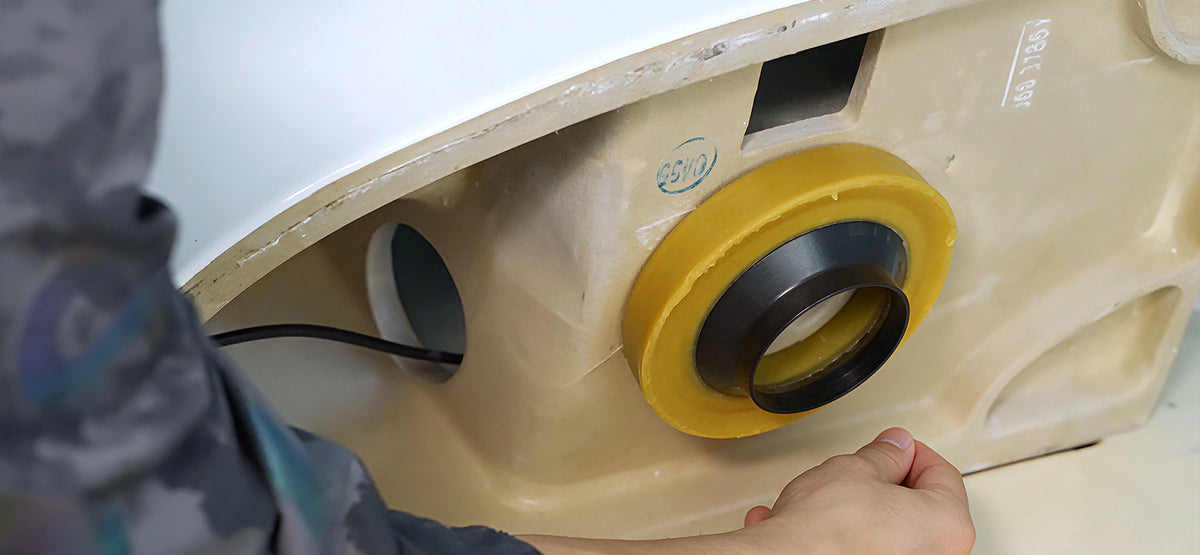
Fit the wax ring onto the drain outlet at the base of the toilet first, before setting the toilet in place.
Use the supplied assembly.
We recommend using the angle valve assembly we provide.
Final checks before completing your EPLO smart toilet installation.
Power cord: 1.2–1.5 m (approx. 4–5 ft).
Two people make lifting and setup easier.
Keep track of each step as you go.
Subscribe now
✓ I agree to the Terms of Use and Privacy Notice.
✓ Send me news and special offers. I can unsubscribe at any time.

We respect your privacy. Unsubscribe anytime.